


1. Choosing a Kit: Always choose a kit that compliments your tube you are using.
2. Re-sizing in kits:
Any kit will work with these tutorials.
But if you use a different sized kit your Re-sizing will be different.
So Re-size your Elements so that they compliment your tube.
3. Elements:
Always open Your elements in sets.. For example
if you are going to use 4 flowers open them all. Copy the first
one close the original paste it into your image. keep doing this t
ill you have pasted all the flowers into your image. It will save you time.
4. Re-sizing settings

5. Sharpen:
Always sharpen your re-sized tubes or elements one time
by going to Adjust/sharpen.
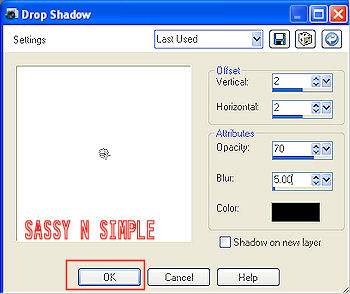
6. Drop Shadow:
Effects/3D/Drop Shadow. Everyone has there on
personal settings that they like
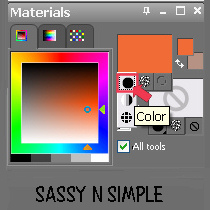
7. MATERIAL PALETTE
Color Selection
You can use your dropper tool to select colors from your image

left click mouse foreground color
right click mouse background color
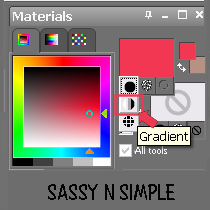
Gradient Selection
Click on the foreground or background palette then select your gradient
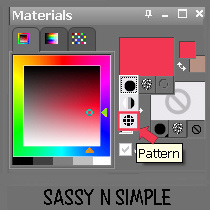
Pattern
Select your pattern by clicking on the fore-ground or background color pallette

9. Selection Tool:

Basic settings

with a feather

10. Warp Brush:

Basic Settings
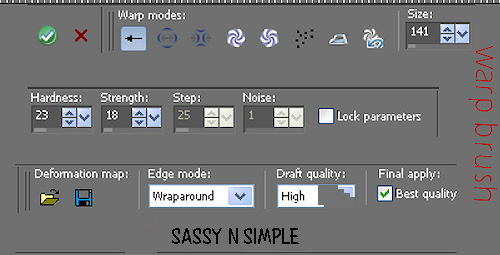
Remember to use this carefully as it will draw up your image. If using on a stat border. I always resize my border once I am finished. By 103%. This makes sure the border will blend once it is put on the stat. Some use warp brush or deform tool. I perfer to re-size to maintain shape.
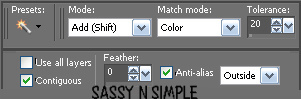
11. Wand Settings I use.
12. Selection tool

Rectangle Settings
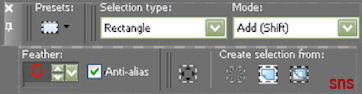
Custom Settings

13. Export a Brush: On your toolbar click File/Export/Custom
Brush Name your brush Save Variance Checked, Step I use 32
but that is a personal choice. Brush size should not be over 450 in
width and about 450 in height. If your brush will not save it is too big.
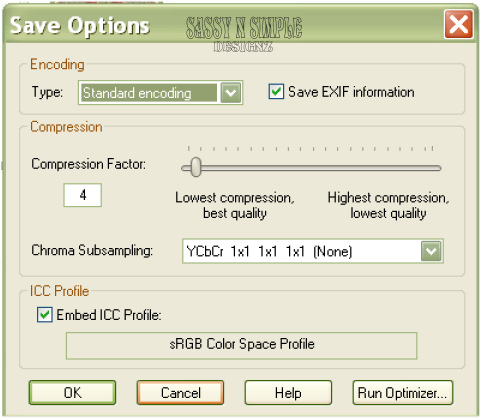
14. Jpeg Settings
15. How to select a Palette to show
Right click on your tool bar This box will pop up
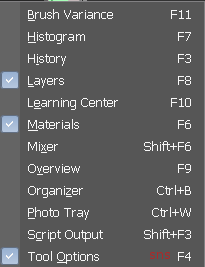
Click on Palletes
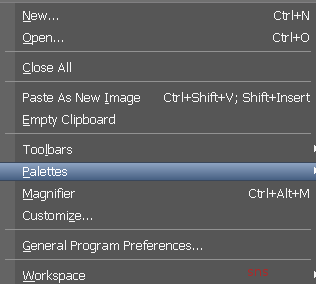
You will now have this box
You just click on the palettes you want to use
I have the main ones we use most selected
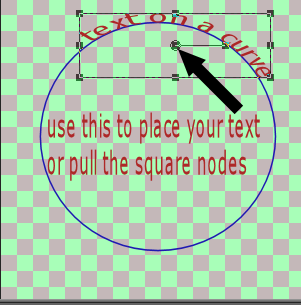
16. Creating Text On a Curve
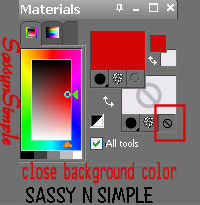
First select your colors in your foreground and back ground
make sure your layers palette is showing see above
Then Select your Eclipse tool

Close off your back ground color
SETTINGS FOR ECLIPSE TOOL

draw out your circle not to big you need room for your text
do not convert raster layer
Now select your text tool
Select your text you wish to use
open back up your background color
Take your mouse and move towards the circle till you see the symbol below
Then type out your text
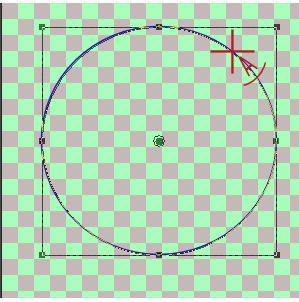
EXAMPLE
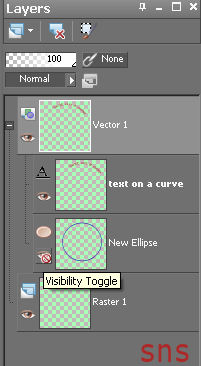
Now in the layers palette you will see
this click on that plus sign
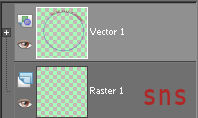
Now you see this See how I clicked
the eye on the circle do that
then click the - minus sign
right click the text layer convert to raster layer
And you are finished.
16. Optimization Settings for Animation Shop HERE
Keep checking back I will had more to this as I can